

Cosmonauts working on the ISS - Image Credit: NASA
 Assignment 1
 The Box Model
Assigned: March 28, 2017
Due: April 7, 2017
Begin by watching and following along with the following videos on the box model:
Next, select two verses or passages of Scripture and put them in a new HTML page. Be sure to include all the usual basic tags.
Add styles to the division tags to match the following:
Verse/Passage 1:
Padding - 30 pixels
Margins - 40 pixels
Border style - double
Border color - some kind of darker blue
Border size - 10 pixels
Background color - a light blue
Text color - the same as the border
Verse/Passage 2:
Padding & Margins - set different sizes for all four sides
Border style - set different styles so that the top and bottom are the same and the left and right are the same but different from the top and bottom
Border color - set different colors so that the top and bottom are the same and the left and right are the same but different from the top and bottom
Border size - set different sizes for all four sides
Background color - set to white Text color - set to black
Put "Your Name's Verses" as the title in the header tags (putting your name in) and save the file as divisions_[your intials].htm.
Double check your document for proper code and correct spelling!
Your document needs to be uploaded to your Sonblazer server account no later than Friday, April 7, at midnight.
Due: April 7, 2017
Begin by watching and following along with the following videos on the box model:
- Click here to watch the video "Box Model Part 1"
- Click here to watch the video "Box Model Part 2"
- Click here to watch the video "Box Model Styles"
Next, select two verses or passages of Scripture and put them in a new HTML page. Be sure to include all the usual basic tags.
Add styles to the division tags to match the following:
Verse/Passage 1:
Padding - 30 pixels
Margins - 40 pixels
Border style - double
Border color - some kind of darker blue
Border size - 10 pixels
Background color - a light blue
Text color - the same as the border
Verse/Passage 2:
Padding & Margins - set different sizes for all four sides
Border style - set different styles so that the top and bottom are the same and the left and right are the same but different from the top and bottom
Border color - set different colors so that the top and bottom are the same and the left and right are the same but different from the top and bottom
Border size - set different sizes for all four sides
Background color - set to white Text color - set to black
Put "Your Name's Verses" as the title in the header tags (putting your name in) and save the file as divisions_[your intials].htm.
Double check your document for proper code and correct spelling!
Your document needs to be uploaded to your Sonblazer server account no later than Friday, April 7, at midnight.
Assignment 2 Banner Fans
Assigned: April 3, 2017
Due: April 14, 2017
Using the Banner Fans web site, create a set of four images that would go together on a single web site, one banner and three buttons. A banner is a wide, short image that can be used as a title on a page. Buttons are smaller, and used as links.
Your banner should be 800 pixels wide by 150 pixels high, and have the title text "Harvest Farms Pecans". It should be saved as a JPEG with the file name:
E-mail your images to Mr. Gwin (jgwin@mvcsonline.com) by midnight on April 14, 2017.
Due: April 14, 2017
Using the Banner Fans web site, create a set of four images that would go together on a single web site, one banner and three buttons. A banner is a wide, short image that can be used as a title on a page. Buttons are smaller, and used as links.
Your banner should be 800 pixels wide by 150 pixels high, and have the title text "Harvest Farms Pecans". It should be saved as a JPEG with the file name:
- title_[yourinitials].jpg.
- home_[yourinitials].jpg
- about_[yourinitials].jpg
- products_[yourinitials].jpg
E-mail your images to Mr. Gwin (jgwin@mvcsonline.com) by midnight on April 14, 2017.
Assignment 3 Tags for Images
Assigned: April 4, 2017
Due: April 14, 2017
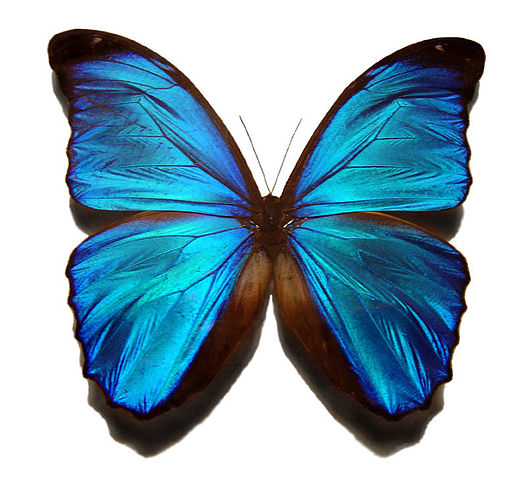
Begin by watching and following along with the following videos on the image tags: Save the file as "resize_[your initials].htm". The image you need to use is below. You can download it by right-clicking and saving.
Your document, and the image, need to be uploaded to your Sonblazer server account no later than Friday, April 14, at midnight.
Due: April 14, 2017
Begin by watching and following along with the following videos on the image tags: Save the file as "resize_[your initials].htm". The image you need to use is below. You can download it by right-clicking and saving.
Your document, and the image, need to be uploaded to your Sonblazer server account no later than Friday, April 14, at midnight.
Assignment 4 Tags for Images
Assigned: April 4, 2017
Due: April 14, 2017
A friend of yours has asked you to produce some graphics for a business web site.
Your friend needs a banner and two buttons for their landscaping business. The banner should be 700 pixels wide by 200 pixels high and include:
Your friend trusts you to pick colors and fonts that will look both beautiful and professional. A border on each graphic is very important to your friend, but otherwise the design is up to you. Just make sure the fonts and colors match across all three graphics!
Using bannerfans.com, create the three graphics and then build a web page that shows all three images. Name your file "yardology_[your initials].htm" and upload it to the Sonblazer webserver by Midnight on Friday, April 14.
DON'T FORGET THAT YOU MUST UPLOAD YOUR PAGES AND IMAGES TOGETHER! If you don't upload the images the they won't show up! Be sure to check your URL online to make sure that it is uploaded.
Due: April 14, 2017
A friend of yours has asked you to produce some graphics for a business web site.
Your friend needs a banner and two buttons for their landscaping business. The banner should be 700 pixels wide by 200 pixels high and include:
- The business name, "Front Yardology"
- The business address, "2045 Broadway Blvd, Las Cruces, NM 88005"
- The business phone, "575 555 1234"
- The business motto, "Beauty is our business!"
Your friend trusts you to pick colors and fonts that will look both beautiful and professional. A border on each graphic is very important to your friend, but otherwise the design is up to you. Just make sure the fonts and colors match across all three graphics!
Using bannerfans.com, create the three graphics and then build a web page that shows all three images. Name your file "yardology_[your initials].htm" and upload it to the Sonblazer webserver by Midnight on Friday, April 14.
DON'T FORGET THAT YOU MUST UPLOAD YOUR PAGES AND IMAGES TOGETHER! If you don't upload the images the they won't show up! Be sure to check your URL online to make sure that it is uploaded.
Assignment 5 Copyright and Fair Use
Assigned: April 10, 2017
Due: April 21, 2017
Any time you use images on a web site you need to be aware of copyright. Copyright is law that protects the creative products and property of individuals from being stolen and re-used by others. You are probably familiar with copyright protection of written material (books, essays, etc.). If you copy and re-use someone else's written work as your own, you've plagiarised their work. Copyright protection extends to many kinds of creative materials, including images.
For this assignment you will conduct online research about copyright protection of images and determine how and when it is ok to use other people's images. At a minimum you should consider the following questions:
Your page will also include three images: a photo you took, a graphic you created, and an image that you download. Each image presentation on your page has a set a requirements to be met:
Due: April 21, 2017
Any time you use images on a web site you need to be aware of copyright. Copyright is law that protects the creative products and property of individuals from being stolen and re-used by others. You are probably familiar with copyright protection of written material (books, essays, etc.). If you copy and re-use someone else's written work as your own, you've plagiarised their work. Copyright protection extends to many kinds of creative materials, including images.
For this assignment you will conduct online research about copyright protection of images and determine how and when it is ok to use other people's images. At a minimum you should consider the following questions:
- What is copyright protection?
- What does fair use mean and how does it work?
- What does it mean to have license (or usage agreement) to use an image?
- What is an image royalty and how does it work?
- Why is copyright an important protection (this can be your opinion)?
Your page will also include three images: a photo you took, a graphic you created, and an image that you download. Each image presentation on your page has a set a requirements to be met:
- The graphic you create should be a title image for your page, 800 pixels wide and 125 pixels high. It should have two lines of text, one being the title of your page and the other your name. Text should be legible (i.e. pick good colors and legible fonts). This graphic should be at the top of the page. You can use BannerFans to create it.
- The photo you took must be an original that you took. You may use one of your Photo Friday images. You should use HTML tags to change its width to 600 pixels (don't change the height... you don't want your lovely photo distorted!). This image should appear the bottom of your page.
- The image you download can be anything you like, but you must give credit as a caption using the citation method you use for your English papers. If you're not sure what method to use, check with Mrs. O'Hara (You can use Purdue Owl and look up citations of Web Pages). If the image is larger than 600 pixels in width, use HTML tags to change its width to 600 pixels (don't change the height... you don't want the photo distorted!). Give the citation (credit) for the license underneath. The image should appear at the bottom of your page beneath your photo.
Assignment 6 Styling Links
Assigned: April 18, 2017
Due: April 28, 2017
Begin by watching the following videos on the styling links: Create a new web page with a set of link styles in the head (similar to what was set up in the example video).
Put a link in your page to a web site of your choice to show off your new link style. The link should change when the cursor hovers over it, but look the same whether the site has been visited or not.
Name the file as "linkstyle_[your initials].htm" and upload it to the Sonblazer webserver by Midnight on Friday, April 28.
The video includes a demonstration of setting up a thumbnail link. You will not be using that for this assignment, but it will be an important part of next week's assignment.
Assignment 7 Web Design Research
Assigned: April 18, 2017
Due: April 28, 2017
What qualities do you think make for a good design of a web site? This isn't about the content of the site, but about the appearance and function. Consider the things about a site that make it easy to use, easy to read, attractive, etc. Also consider things about a site that make it more challenging to use, hard to read and unattractive. Make two lists, one for the positive qualities and one for the negative. You may discuss these with your fellow students if you like.
Next, begin researching different web sites. Identify some that you think have good design qualities and others that you think hve poor design qualities. Make a list of the names of the sites, their URLs (addresses) and the reasons why you think they are good or poor designs.
Finally, build two pages, one with at least four global links to web sites that you think have good design qualities and another with at least four links to web sites that you think have poor design qualities. Under each link write two to three complete sentences describing why you think they have good or poor designs.
There should be a local link on each page linking it to the other so that users can easily go back and forth between them.
Name the two pages "gooddesign_[your initials].htm" and "poordesign_[your initials].htm". Be sure to include an appropriate title in the title tags and some sort of heading for each page using the h1 or similar tags.
Use table or div tags to format your pages and incorporate some color possibly even adding some style to the links and text. Think about the good design qualities you identified and apply them to your choices.
Double check your documents for proper code and correct spelling!
Upload your files to the Sonblazer webserver
by Midnight on Friday, April 28.
Assignment 8 Resizing Images In Photoscape
Assigned: April 24, 2017
Due: May 5, 2017
Before you begin, make sure that you have Photoscape 3.7 installed on your computer. If you do not, please ask Mr. Daves for assistance.
Begin by watching the following videos on Photoscape. It's recommended that you have Photoscape open and follow along using an image of your own.
Upload all eight files (your web page plus the seven images) to your Sonblazer server account. IN YOUR ACCOUNT, CREATE A NEW FOLDER NAMED "resized_images". When you go to check your files online, your URL will be http://[yourname].sonblazer.net/resized_images/photoscape_{yourinitials].htm.
This assignment is due Friday, May 5.
Due: May 5, 2017
READ ALL DIRECTIONS FOR THIS ASSIGNMENT CAREFULLY BEFORE BEGINNING!!!
Before you begin, make sure that you have Photoscape 3.7 installed on your computer. If you do not, please ask Mr. Daves for assistance.
Begin by watching the following videos on Photoscape. It's recommended that you have Photoscape open and follow along using an image of your own.
- Click here to watch the video "Photoscape Pt 1"
- Click here to watch the video "Photoscape Pt 2"
- Click here to watch the video "Image Resizing and Cropping in Photoscape"
Step 1: Copy An Original Image
On your flash drive, create a new DIRECTORY/FOLDER with the name "resized_images". Select one of your images from last week's Photo Friday to use for this assignment and copy it into your "resized_images" directory. Rename the image "original_[yourinitials].jpg".Step 2: Resizing the Original Image
Using Photoscape, resize the image and save the resized images per the filenames given below (for example, if the image name is image_50_[your_initials].jpg you should resize the image to 50% of its original width and height, or if the image name is image_300x800_[your_initials}.jpg, it should have a width of 300 pixels and a height of 800 pixels).- image_50_[yourinitials].jpg
- image_10_[yourinitials].jpg
- image_900x300_[yourinitials].jpg (this image will be distorted).
- image_100x100_[yourinitials].jpg (this image will be distorted).
Step 3: Cropping the Original Image
Using Photoscape, crop the original image and save the cropped images per the filenames given below. You may crop to select any area of the image you like.- image_400x200_[yourinitials].jpg
- image_100x200_[yourinitials].jpg
Step 4: Place All Seven Images in a Web Page
Place all seven of the images (original image and all six resized or cropped images) into a web page named photoscape_[yourinitials].htm. Be sure to use the ALT text, putting a description of the dimensions of the image and how you made the image in the ALT (for example, alt="Image resized in Photoscape to 800 pixels wide by 400 pixels high").Upload all eight files (your web page plus the seven images) to your Sonblazer server account. IN YOUR ACCOUNT, CREATE A NEW FOLDER NAMED "resized_images". When you go to check your files online, your URL will be http://[yourname].sonblazer.net/resized_images/photoscape_{yourinitials].htm.
This assignment is due Friday, May 5.
Quarter 4 Project Photo Album
Assigned: May 1, 2017
Due: May 26, 2017
Begin by watching the following videos on Photoscape Batch Editing.
There are five basic requirements with this project:
Tips and Suggested Steps for Beginning
Grading
Upload all files to a new directory in your Sonblazer server account named "album" (you will need to create this directory yourself) no later than Friday, May 26th. When you go to check your files online, your URL will be http://[yourname].sonblazer.net/album.
Due: May 26, 2017
READ ALL DIRECTIONS FOR THIS ASSIGNMENT CAREFULLY BEFORE BEGINNING!!!
Begin by watching the following videos on Photoscape Batch Editing.
There are five basic requirements with this project:
- A web page, named "index.html" with a thumbnail image of all Photo Friday photos from the semester, accompanied by a minimum of two to three sentences of text describing the image.
- Each image should link to the full size (original) image it represents.
- The page should have a banner at the top designed by you in BannerFans, Photoscape or a similar graphic editing program.
- The page should be formatted using a table or some other format to keep the appearance of the page neat and organized. Thumbnails should be 300 pixels wide. Thumbnails must be resized in an editor, not using HTML width style! Using a batch editor will save you time on this step!
- Each image description must include a citation for the source of the image (You took all these images yourself! There is a way to cite images if you yourself took them!)
Tips and Suggested Steps for Beginning
- Copy all of your Photo Friday images into a single folder. Rename the images to a numbered system. For example, your first image might be photo_friday_image_01.jpg, the second would be photo_friday_image_02.jpg, etc.
- Use Photoscape batch editor to create thumbnails for all of your images. Be careful not to overwrite your original images!
- On a piece of paper, sketch out a diagram for your photoalbum page. Think about how wide and high everything should be, and how you plan to code the layout.
- Copy-paste is your friend! Try building one row of your photo album and make sure it works, including the link from the thumbnail to the full size image.
- Don't wait! Get this done as soon as you can! You may need help or have questions and waiting until the last minute may not leave you enough time!
Grading
- A project will receive 60% credit (D-F) or lower depending on the degree to which is meets the basic requirements.
- A project will receive 70% credit (C) if it fulfills all of the basic requirements.
- A project will receive 80% credit (B) if it fulfills all of the basic requirements and also demonstrates use of styles like font, border, color, padding and margin to design layouts.
- A project will receive 90% credit (A) if it fulfills all of the basic requirements and also demonstrates use of styles such as border, color, padding and margin to design layouts that are comfortable to look at (good color combinations, good use of space between parts of the page).
- A project will receive 100% credit (A+) if it fulfills all of the basic requirements and also demonstrates use of styles such as border, color, padding and margin to design layouts that are creative and pleasing to look at.
Upload all files to a new directory in your Sonblazer server account named "album" (you will need to create this directory yourself) no later than Friday, May 26th. When you go to check your files online, your URL will be http://[yourname].sonblazer.net/album.
Semester Final Project
Assigned: May 8, 2017
Due: May 26, 2017
For your final project, you will build a web site about a topic of your choosing that has one introduction page and a minimum of three sub-topic pages. You will upload the finished project to your own project folder on the sonblazer.net web server.
Step 1: Choose your topic.
Your topic is going to need to be broad enough to have a minimum of three sub-topics, one for each of the sub-topic pages. For example, if you were going to choose "String Quartets" as your topic, your three sub-topics might be:
Step 2: Diagram your site.
All of the pages on your site should have roughly the same layout. At the top you should have a main banner that appears at the top of all four (or more) pages on your site. Each page should have a menu of buttons that link to all of the other pages on the site. Each of the sub-topic pages should have a small banner underneath the main banner with the title of the content page.
Step 3: Gather Content
Your main page should have at least one image and one paragraph which serve as an introduction to your site.
Each of your sub-topic pages must have a minimum of two images (not including the buttons and banners) and two hundred words (grammar and spelling count!). IF YOU DOWNLOAD IMAGES FROM THE INTERNET BE SURE TO CITE WHERE THE IMAGE IS FROM! GIVE CREDIT WHERE IT IS DUE! If it is your own image, give yourself the credit! All credit must be shown on your web page where you use the image. You don't have to give credit for your banners or buttons.
Step 4: Build Your Pages
Your main page should be name 'index.html'. You may name the sub-topic pages whatever you wish.
Keep everything, your pages and images, together in a single folder on your computer to help keep it organized.
Make sure you double check your spelling and code, and give credit where needed!
Step 5: Upload and Check Your Site
You will upload the finished project to your own project folder on the sonblazer.net web server. Your files will all go in the main folder on the server so that if you type in the URL yourname.sonblazer.net, your page will load.
Summary:
There are four basic requirements with this project:
Grading
A project will receive 60% credit (D-F) or lower depending on the degree to which is meets the basic requirements.
Projects will be due by midnight, Friday, May 26th. Your projects must be turned in by that point. Your access through Filezilla will be closed at that time and you will receive a grade based on what you've uploaded.
Due: May 26, 2017
READ ALL DIRECTIONS FOR THIS ASSIGNMENT CAREFULLY BEFORE BEGINNING!!!
This is your chance to take everything you've learned and build a site that lets you put information about something you're interested in on the internet for the world to see!For your final project, you will build a web site about a topic of your choosing that has one introduction page and a minimum of three sub-topic pages. You will upload the finished project to your own project folder on the sonblazer.net web server.
Step 1: Choose your topic.
Your topic is going to need to be broad enough to have a minimum of three sub-topics, one for each of the sub-topic pages. For example, if you were going to choose "String Quartets" as your topic, your three sub-topics might be:
- The Violin
- The Viola
- The Cello
Step 2: Diagram your site.
All of the pages on your site should have roughly the same layout. At the top you should have a main banner that appears at the top of all four (or more) pages on your site. Each page should have a menu of buttons that link to all of the other pages on the site. Each of the sub-topic pages should have a small banner underneath the main banner with the title of the content page.
Step 3: Gather Content
Your main page should have at least one image and one paragraph which serve as an introduction to your site.
Each of your sub-topic pages must have a minimum of two images (not including the buttons and banners) and two hundred words (grammar and spelling count!). IF YOU DOWNLOAD IMAGES FROM THE INTERNET BE SURE TO CITE WHERE THE IMAGE IS FROM! GIVE CREDIT WHERE IT IS DUE! If it is your own image, give yourself the credit! All credit must be shown on your web page where you use the image. You don't have to give credit for your banners or buttons.
Step 4: Build Your Pages
Your main page should be name 'index.html'. You may name the sub-topic pages whatever you wish.
Keep everything, your pages and images, together in a single folder on your computer to help keep it organized.
Make sure you double check your spelling and code, and give credit where needed!
Step 5: Upload and Check Your Site
You will upload the finished project to your own project folder on the sonblazer.net web server. Your files will all go in the main folder on the server so that if you type in the URL yourname.sonblazer.net, your page will load.
Summary:
There are four basic requirements with this project:
- One introduction web page named 'index.html' with the main banner, menu buttons, at least one image and one introductory paragraph.
- A minimum of three sub-topic pages named whatever you like, each with the main banner, a topic banner, menu buttons, at least two images and two hundred words of text on the sub-topic.
- All of the pages on your site should have a matching style (colors, fonts, buttons) so that it looks like they all belong to the same site.
- Each image (besides the buttons and banners) must include a citation to the source of the image. You can include citations next to the images or at the bottom of the page.
Grading
A project will receive 60% credit (D-F) or lower depending on the degree to which is meets the basic requirements.
- A project will receive 70% credit (C) if it fulfills all of the basic requirements.
- A project will receive 80% credit (B) if it fulfills all of the basic requirements and also demonstrates use of styles such as border, color, padding and margin to design layouts.
- A project will receive 90% credit (A) if it fulfills all of the basic requirements and also demonstrates use of styles such as border, color, padding and margin to design layouts that are comfortable to look at (good color combinations, good use of space between parts of the page).
- A project will receive 100% credit (A+) if it fulfills all of the basic requirements and also demonstrates use of styles such as border, color, padding and margin to design layouts that are creative and pleasing to look at.
Projects will be due by midnight, Friday, May 26th. Your projects must be turned in by that point. Your access through Filezilla will be closed at that time and you will receive a grade based on what you've uploaded.
Click here to view Third Quarter assignments and videos.